Pages

Wednesday, October 14, 2009

Little Keepsake Necklace
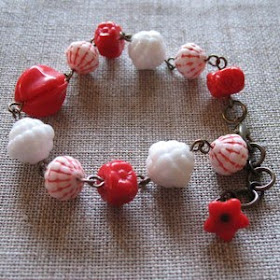
Just a couple of pretty new things from my Madeit Shop
I just wanted to share with you all the new
Madeit Gift Guide Blog
It's updated daily with lovely handmade items from Madeit, Interviews with Shops that Sell Handmade & Features on some of our Fabulous Markets in Australia :)

Since my last post, we have had a weeks holidays in Katoomba, NSW Australia
I just wanted to share this picture I took of The Three Sisters for all of my overseas visitors. The first four days of our stay we couldn't even see the sisters because of the foggy weather which really added to the atmosphere of being in the mountains. Fortunately the fog lifted on the afternoon of my birthday, Couldn't ask for a more beautiful day if I tried!

Hope you all have a Delightful Week ♥

Thursday, October 01, 2009

a little while ago I was sent some Gorgeous Cosmo Cricket paper from Australian Cardmaking, Stamping & Papercraft and asked to make some cards....What Fun!
These Papers, Ribbons and Embellishments are a dream to work with and oooohhh so pretty :)
I made these two cards, both with lots of sewing and layering. These papers reminded me of Patchwork fabric and all of the quilts I have made and those hidden away in my cupboard unfinished (oh the shame....lol!) They appeared in
Australian Cardmaking, Stamping & Papercraft
Vol 15 No 4
I know it's been ages since I last blogged, our September was our so busy with 2 School Musicals, A Singing Concert, A Drama Festival, A Trip to Sydney for State Tournament of the Minds, a Weekend Trip to our old home town of Inverell to see my parents, A Craft Fair at which I had a stall with my jewellery, and so on......

Now it's October we are coming up to Breath... :)
and we start our School holidays on Friday afternoon
and my Husband starts 4weeks annual leave - Yay!!!


A Big Happy Birthday to
Nathan, MJ, Grandma, Bradley & Jacob
I love you all!!!!

May your October be a Truly Fun one!

Monday, August 31, 2009

pretty things....

The Gardener
Steampunk BraceletJust wanted to share these two pieces I have made in the last week.
I was quite pleased with them both
I love the Mixture of the Verdigris & Antique finish of The Gardener
and I just love the Dark Brass and Vintage Findings of the Steampunk Bracelet.
I hope your week is a Creative one :)

Friday, August 28, 2009

Button Swap.....

On Madeit we have a forum for members.
It's a little forum that I find very encouraging and enjoyable to apart of. Over the past month a handful of us have taken part in a 'Button Swap' We were to make two items using buttons and include a little 'stash' of buttons as well.

Well today my parcel arrived :)
From the lovely Caryn of Smooch Designs
I felt like a little child opening up a present at Christmas, I squealed!
and here is why!
I know.....I am spoilt!
I received this STUNNING Clutch (in my colours and everything!!!)
the Sweetest Button Bouquet (I've always wanted one of these!!!)
Two bags of fabby, fabby buttons (I have a plan in my head already for these!)
and the prettiest Paper Butterfly :)
I wanted to take a moment to show you my new clutch!

How Gorgeous is this fabric!

If I went out to a fabric shop and picked the fabric for a custom clutch then I would have chosen this fabric, I love the colours and the pattern (it looks so fabulously 1940's)
look at the back! it's really pretty too! & more matching fabric!
I wanted to show you the detail Caryn has gone too when constructing this beautiful piece.

It is lightly padded so it feels beautiful to touch, inside matching pocket & lining, also Caryn has taken time to sew little covers at each end of the zipper.... I also noticed when I put the strap over my wrist because it has the 'D ring' it allows the strap to bend and sit beautifully when my hand is threaded through the strap and my hand holds the top of the clutch....finally Everything is 'top stitched' :)

This is what I love about Handmade ~ attention to detail and made with love :)

Thank you so much Caryn
I feel completely spoilt ♥

ps.....I know I said I'd be back with a mixed media piece I've been working on but I'm still not finished...it's not that it's huge..But I need to find the time to finish it off ;)

have a delightful weekend everyone!

Thursday, August 06, 2009

In the meantime....

I am working on something at the moment, it's a Mixed Media piece...
and it's taking a little while to finish,
So in the mean time....

Saturday, July 25, 2009

Discovery - a little box....

I had fun making this little box,
which Lachlan has claimed for his room, my children love little boxes to hide their treasures in.
I used the Darkroom Door Wilderness vol 1 Set.
Lot's of layers of ink, embossing powder, gesso, stitching and more embossing powder.
I just love this stamp of the tree line, it was a perfect size for the sides of the little box.
Well the children go back to school on Tuesday, we've had a lovely holiday with friends coming for sleepovers and all sorts of things filling our days ~ holidays are always too short in our home!

I stepped down this month from The Stamping Queen Design team.
I still love TSQ, The Queen & the girls on the team...
I will still be creating and working away, but it's just time for a little change for me and time to focus on other things :)

Well my friends, I hope you are all having a lovely weekend!

Friday, July 10, 2009

I get the prettiest mail....

lookie what my Postie delivered today
Isn't it Gorgeous!
This beautiful necklace is made by
Narelle ~ Maker of precious objects
I entered a competition on her blog and I won!!!!
I can't tell you how excited I was, I had been admiring this necklace for quite a while and even had it saved in my favourites on Madeit so to win it was such a thrill!
Thank you so much Narelle you make such gorgeous treasures & I'm so proud and excited to be able to wear this perfectly sweet treasure ♥
~~~~~~~~~~~~~~~~~~~~~~~~~~~~~~~~
also, I am delighted to be included in a Review on
Francie Horton's blog 'Just Be'
it's a lovely honour, thank you so much Francie ♥
Your blog is beautiful :)

Wednesday, July 01, 2009

An Art Pin

Oh man this was sooooo much fun to create :)
as mentioned in an earlier post I recently purchased some Super Sculpey. Well I've been busting to use my stamps with it, and this is just my MOST favourite stamp at the moment!
it's one of the Gorgeous stamps from the Darkroom Door Stamp DDRS027 Artist set
Barb has got this gorgeous stamp at
Seriously this particular type of sculpey is amazing to work with, it's soft and imprints beautifully as you can see in this photo.
I inked my stamp with Versa Fine Onyx Black Inkpad, and stamped it into a piece of rolled out sculpey, trimmed it and baked the scupley as per the instructions.
then I brushed Gesso over it and wiped it off with a damp rag (I did this about 5 times till I got it just how I wanted it to look)
Next I drilled a hole - I told you this stuff is amazing, you can drill in it without it cracking or splitting (I was careful ofcourse) and attached the old key at the bottom.
The letter G at the top is a Rusty Pickle Alpha Brad, I simply trimmed the back of the brad off with my old scissors and glued it on.
And there you have it!

Thanks for looking everyone :)
I hope you are all having a great week!

Sunday, June 28, 2009

Designer Spotlight.....

I am thrilled to bits to be the designer featured in the latest
Designer Spotlight on
If you'd like to read my interview,
you can by clicking on the Madeit sign below
I'm the one with the Big Smile :)

Saturday, June 27, 2009

My little artist and her adventures with Sculpey...

Yesterday Georgia and I had such fun playing with sculpey :)
She wanted me to share with you what she made.
It's a little 'Sun Art Doll'
called 'Sunny' :)
This is the new mould I bought this week, and this lovely large box of sculpey...
Georgia and I will be having a lovely time playing with it over the next couple of weeks.
It's such a lovely craft for both children & adults.
I've so many plans for this face mould, even as I'm sitting here now typing away I'm thinking up more ideas.... & I'm keen to use some of my rubber stamps with the sculpey also...

Friday, June 19, 2009

My Beautiful Friend.....

This is a 6 x 6" collage which I will turn into a card
for one of my dear friends,
lots of layers and elements blended together
~ a bit like friendship really....
I used lots of lovely pieces from
The Stamping Queen to create this piece.
you can see the Collections Elements transparency at the top, german scrap, ribbon and rhinestone trim, the backing is a collage of Collections Elements Printed Paper
I had a piece of Collections Elements Dictionary Strip in Kraft left over from my dtpack, and used that as part of the backing collage also along with some Collections words
I used my newest stamp also This lovely 'Parisian Label 196' by Art Declassified, & added a few rub-ons over the top :)
I also used Collections Chipboard frame, Image & Vintage Buttons.


Have a Simply Wonderful Weekend Everyone :)

Tuesday, June 16, 2009

1...2...3 an art pin

Here's a quirky little Art Pin I have made using some of my Design Team supplies from
and a few of my other bits and pieces I had floating around in my collection ;)
The Base for the pin is an old wooden domino and that charming gentleman is from Darkroom Door Photo Booth sheet, he is actually with another chap in the photo, but he is easy to separate from the other chap with a pair of scissors making him the perfect size to put on the domino.
The Image & the little hat and word are sealed with modpodge (or pva glue) and then a layer of Royal Coat Dimensional Magic is applied over the top, I love that the little red dots fill up with the dimensional magic, but you can still feel they are hollow.
I used Collections Elements Dictionary Strip in Kraft for the words on the side of the domino and on the wooden tape measure at the top. One Side reads
'Made of unrelated things joined together'
& the other side reads
'objects made of pieces fitted together' :)

I also used ~ a piece of wooden builders ruler, beading wire, seed beads no.5, jump rings, and a vintage typewriter key.


Have a Delightful Week everyone :)

Saturday, June 13, 2009

We love you Grandad....

This card has just been published in
Australian Cardmaking Stamping & Papercraft Vol 15 No 1

(appologies for the scan, but I do love the way they have photographed this card
and I haven't got the card at the moment to photograph).

I used a few of my Favourite The Stamping Queen Stamps on this card
Queens Dresser Drawers Pensive Philip, Paper Artsy At Home Plate 3, Large Gears Stamp,I also used Creative Imaginations Journalling Frame & my Glimmer Mist in Graphite.

Have a wonderful weekend everyone!
I'll be back soon with some new creations I'm working on :)

Thursday, June 04, 2009

When I fall in love.....

I have had a lovely time once again playing with my design team pack from
This is a little wooden hanger (7 1/2" long)
I used a Chipboard Tag to make this hanger, and used Mod Podge to adhere all of the layers together, I gave the piece a subtle look by brushing Gesso over the top and wiping it off before it dried, then sealed the finished piece with more Mod Podge. Then a very light brush with Kindy Glitz to give the piece a hint of whimsy...(although the glittery Kindy Glitz isn't very visible in the photos)
I used ~ Designs Galore VB012, Collections Elements Baroque Papers, Collections Elements Dictionary Strip Kraft C0637, Basic Grey Fruitcake Fibres.
& from my own little stash ~ Cosmo Cricket Sticker, Rub-ons, Vintage Buttons, wooden tag.

I hope you all have a truly delightful day :)

Tuesday, May 26, 2009

Inspire - an art doll....

I've had some Beautiful pieces in my Design Team kit from
I particularly love this Printed Acetate by Collections
and I really wanted to create an art doll with it.
Well her she is
~ Inspire ~
I placed the acetate over the top of a 'raw' chipboard dress form and sewed it in place.
the Wooden Flourish is glued to the back and then sandwiched between the front dress form and another which gives this piece a lovely substantial feel.
here's a little tip for you when sewing Acetate onto chipboard ~
take a piece of scrap paper, using double sided tape tape your piece of chipboard to the scrap of paper, cut your acetate piece a little larger than your chipboard shape (my shape was the manican) Place your Acetate over the top of the Chipboard shape and tape the edges of the acetate (remember you cut it larger than the chipboard shape) to the scrap paper.
this holds everything firmly and stops it from slipping while you sew.
Once you have sewn your acetate to the chipboard shape, you can simply remove the excess scrap paper & acetate from the edges.

If you'd like to see the other pieces created by
The Stamping Queen Design Team
we'd love you to check out our blog :)
TSQ Design Team Blog

Monday, May 25, 2009

A Vintage Buckle.....

Recently My Dear friend gave me a bundle of buckles that were her Grandmothers....
A Sentimental Gift to say the least.
She thought I could use them with my craft work, and indeed I will :)
I asked her which was her favourite, and she choose this lovely 1920's Bakelite one.
I knew I wanted to make her something using this buckle,
but what..... as always the best thing to do is to gather your supplies and start playing.
And the result was this necklace, She loved it....yay!